5.31.2011
Key Lime Pie
Until now.
Key Lime Pie, you stole my heart the first time I made you.
For one of the first times in my baking existence, the first recipe I tried is dead on. No need to look any further. It is like when I first met my husband, I just knew. Well almost.
My main disdain with pies in general is their crust, I simply do not care for the globby, soggy crust of pasty flour and butter. It takes away from the beauty of what it is encasing. If it is fruit I'd rather have a cobbler, and go straight for the good stuff. Of course their is one exception: graham cracker crusts, IF the pie fits.
Key lime pie filling is so amazingly tart and refreshing, you almost need a little crust to mellow the flavor. So thanks to some Allrecipes research, I found this recipe fast and it's perfect, just perfect.
Key Lime Pie
1 9 inch Graham Cracker Crust, or GF crust if that's how you roll!
3 eggs
1/2 cup key lime juice
1 (14 oz) can sweetened condensed milk
pinch of salt
pinch of cream of tarter
Whipping Cream and lime for Garnish (optional)
Separate 2 of the eggs, placing the two egg whites into a mixing bowl. Reserve the yolks in another bowl.
To the yolks, add one whole egg, lime juice and sweetened condensed milk. Whisk until smooth.
With clean mixer blades or a whisk attachment, beat the egg whites with salt and cream of tartar until stiff, but not dry. Fold whites into filling mixture. Pour filling into crust.
Bake in preheated 325 degrees for 20 minutes or until set (not jiggly). Let cool at room temperature, then refrigerate (optional place in freezer for an hour before serving for easier slicing). Serve decorated with whipped cream and lime slices.
5.25.2011
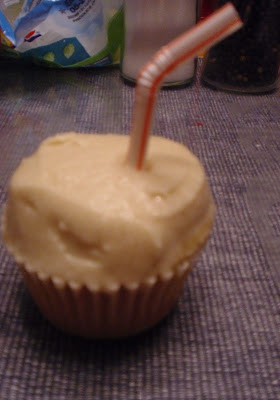
Root Beer Float Cupcakes
But every once in awhile, you just want to let your hair down, and get crazy. Shake it up. I had a cupcake the other day from Harmon's bakery that had a unique root beer flavor. Whenever I experience something new I like, I instantly ask myself the question, "how can I recreate this, or perhaps make even better?"
I'm a perfectionist, its true. These aren't yet perfect, but it's worth working towards.Root Beer Float Cupcakes
1 ½ cups cake flour (if you don't have any use AP and replace 2-3 tbsp with cornstarch)
1 ¼ teaspoons baking powder
½ teaspoon salt (I always use a touch more)
Mix above dry ingredients in a bowl:
½ cup unsalted butter, room temperature
1 cup sugar
1 egg plus 2 egg whites½ teaspoon vanilla extract 3/4 cup buttermilk
1/2 teaspoon vanilla extract
Cream the butter and sugar together until soft and creamy.
Add in egg and egg whites, one at a time, beating thoroughly after each addition to combine before adding the next.
Add in the flour mixture and milk mixture in three alternating additions, starting and ending with the flour mixture. Beat just to combine each addition before adding the next.
Using an ice cream scoop or a spoon, fill each cupcake liner about ¾ full with batter. Bake in oven for 15 to 18 minutes, rotating the pan halfway through, until a toothpick inserted in the cupcakes comes out clean.
Let cupcakes cool completely before decorating. And then of course, the best part....
Buttercream Frosting
1/2 cup unsalted butter (1 stick)
3 cups powdered sugar
1 teaspoon root beer concentrate
1/2 teaspoon vanilla
2-3 tablespoons milk, until desired consistency is acheived
Cream butter and add sugar until combined, then add root beer and vanilla, mix then add milk until desired consistency is achieved.
Lastly, enjoy.....
5.21.2011
Homemade Chewy Granola Bars
In a word: control. It's sick to admit, but I love to have control, it's like being in the driver seat of a fast convertible and going wherever, and I mean WHEREVER you want to go. Most especially I love to control what goes into my edible creations, which is perhaps why I like baking so much. While there is a certain framework that must be established to achieve the correct results and texture, you can add your own flair through flavor, creativity, and playful experimentation. Thus no two cookies, no two brownies, no two cakes, no two muffins, no two breads, no two anythings needs ever be exactly alike. As vast as the stars in the sky, as vast the variety of baked goods. Granola bars, a great way to show such personal flair.
When I saw a recipe for Homemade Granola Bars, and realized I could balance the ingredients to suit my specific preferences, and not rely on Quaker's mass produced items, I was delighted, I was awed, a whole new world opened before my eyes.
There are lots of different ways to go about a granola bar, even the base can be altered and comprised in many varieties. I went with this one for simplicity, ease and egg free. The ingredients I chose worked for me that day, I kept things pretty classical since this was my first granola bar experimentation. But next time I plan to get crazy, I mean seriously crazy, start a rockin' granola party in my kitchen, and you are invited! Sky is the limit for ingredients just as long as it's edible and not say, I don't know: meat. Possible variations I'm considering:
dried cranberries with white chocolate chips and salted macadamia nuts,
whole almonds with salted pepitas and dark chocolate,
chai spiced with cinnamon chips and dried blueberries
crushed pretzels with dark chocolate and dried cherries
salty cashews with crispex cereal, raisins and caramel tidbits
different grains like quinoa and cereal like crackin oat bran, honey nut cheerios
Homemade Chewy Granola Bars
3 cups old fashioned oats
2 cups rice cereal
2 tbsp flax seed
1/2 cup slivered almonds
1 cups raisins
1/2 mini chocolate chips (the minis are great for these)
1 tsp cinnamon
1/2 tsp cardamom
pinch of sea salt (especially if you love salty & sweet)
1 can sweetened condensed milk
Place the can of sweetened condensed milk in hot water prior to opening while mixing dry ingredients. Mix dry ingredients and spices in a bowl, pour milk over and mix well.
Flatten out on 11X17 jelly roll pan lined in parchment paper. If you like the salty & sweet combo sprinkle with a touch of sea salt. Bake at 350 for 20-25 minutes (chewier less time, crispier more).
Cool 5-10 minutes in pan, and then cut with large sharp knife into bars. Cool completely and I recommend placing in small baggies to resist the temptation to eat the whole pan, standing in the middle of your kitchen!